DIY Tankless Flushing Risks vs Professional Service
DIY flushes commonly miss flow direction, cabinet cleaning, filter replacement, or unit reset — often leaving scale behind. When DIY pays vs when it costs more.
6 min read
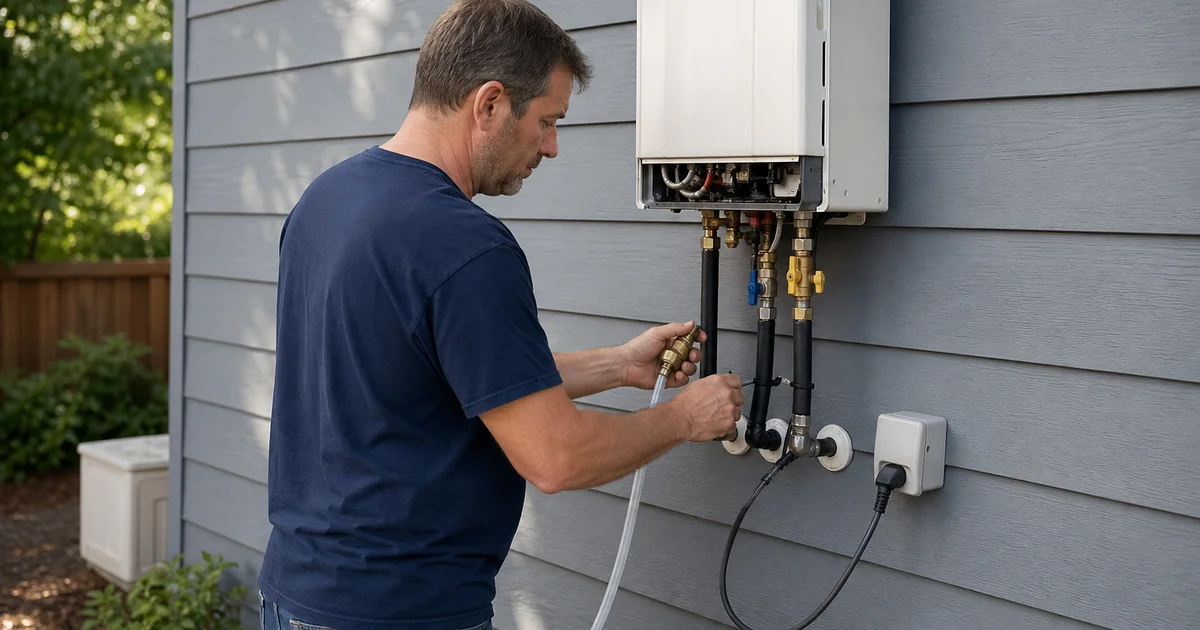
We see the same scenario play out every spring with handy homeowners. YouTube tutorials make flushing a tankless unit look incredibly simple, promising an easy way to avoid a $200 professional service fee. The reality is that the failure rate for diy tankless flushing is shockingly high.
These consequences rarely show up immediately. A poorly executed flush usually reveals itself a year or two later when the unit locks out on a cold morning.
We will break down the specific steps most DIY tutorials skip, examine what the data actually tells us about cost savings, and outline exactly when it makes sense to handle this yourself.
The Five Things DIY Flushes Commonly Miss
Watch a typical tutorial, and the host usually covers the basic circulation loop. That basic diy descale tankless loop represents only a fraction of proper preventative maintenance.
We find that skipping the other critical steps leaves your system vulnerable to major failures. Here are the specific areas usually ignored by a quick kit approach:
1. Correct Flow Direction
Proper maintenance requires flushing most modern tankless heat exchangers, including popular models from Rinnai and Navien, in reverse of the normal flow direction. Standard descaling pumps connect easily either way, causing a user to attach the hoses in the normal flow direction by mistake.
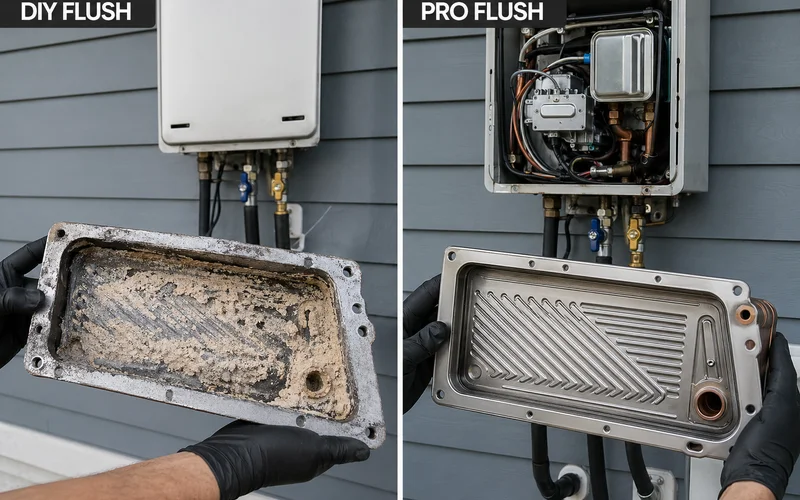
This error means the descaler cannot reach the internal bends of the heat exchanger where calcium scale concentrates the most. We regularly see units where a backwards flush pushed debris deeper into the system, leading directly to a costly heat exchanger replacement. A new heat exchanger typically runs between $600 and $1,300 in 2026, completely wiping out any DIY savings.
2. Cabinet and Burner Area Cleaning
A flush kit strictly addresses the water lines, completely ignoring the air and combustion chambers. Dust, pollen, and combustion byproducts accumulate heavily around the burner assembly over time, especially in dusty regions like the US Southwest.
Our technicians use compressed air and specialized soft bristle brushes to clean the cabinet interior and burner area. This physical cleaning is critical to maintain combustion efficiency and targets three main components:
- The primary burner assembly
- The ignition rods and flame sensors
- The internal cabinet floor
3. Inlet Filter Replacement
The stainless steel mesh filter located at the cold water inlet acts as the primary defense against municipal debris. A true professional service inspects, physically cleans, and replaces this 3/4-inch filter element if it shows signs of wear.
DIY flushers typically do not even open the filter housing during their process. The result is a clogged screen a few months later, triggering a frustrating “no hot water” symptom. This restriction often throws a specific flow-related warning, like a Rinnai Error Code 11 or Navien E011, which looks identical to a major mechanical fault.
4. Air Intake Filter Cleaning
High-efficiency condensing units rely on a separate air intake filter to supply clean oxygen for combustion. This critical PVC venting component is separate from the water inlet and is often entirely overlooked in basic tutorials.
We always check this screen for common blockages, including dead insects, leaves, and lint. Restricted airflow causes the burner to run hotter and dirtier.
“A completely blocked intake will force the system to shut down for safety, instantly displaying a venting fault like Error 10 on your control panel.”
5. Service Counter Reset
Modern tankless control boards internally track your maintenance intervals based on runtime and burner cycles. A professional service includes accessing the diagnostic menu to reset this internal counter.
Doing this updates the unit’s warranty-valid status and clears any pending maintenance alerts. DIY flushes do not include this critical electronic reset, leaving the unit’s computer thinking that maintenance is years overdue. This oversight can trigger annoying fault codes and create massive headaches if you need to file a warranty claim later for a failed part.
When DIY Actually Pays Off
There are a few specific scenarios where figuring out how to flush tankless yourself actually makes financial sense. The math only favors the DIY approach if you meet very strict conditions regarding your water quality and equipment age.
We recommend attempting this yourself only if your situation matches one of these three narrow profiles:
- Homeowner with isolation valves, modern unit (under 5 years), and very soft water. Residents in the Pacific Northwest often have water hardness below 3 grains per gallon (GPG), meaning minimal scale forms and the warranty risk remains low.
- Routine flush during transition between full annual maintenance visits. A quick mid-year circulation acts as a handy supplement for high-use commercial properties, providing preventative care rather than a replacement for professional service.
- Cost-constrained households in soft-water regions. If the average $150 to $250 professional service fee in 2026 is genuinely unaffordable, a careful DIY approach is better than ignoring the system entirely.
Outside of these specific environments, the long-term math heavily favors bringing in a licensed professional.
When DIY Costs More
Taking the cheap route can backfire spectacularly and cost you thousands of dollars in secondary repairs. A failed DIY attempt usually damages the most expensive components inside the heater.
Our teams frequently encounter these three scenarios where trying to save a buck creates a massive plumbing bill:
- No isolation valves installed. Retrofitting a set of Webstone or Watts isolation valves costs between $300 and $500, which instantly exceeds any perceived DIY savings.
- Hard-water region. According to the USGS, nearly 85% of the US has hard water. DIY flush failures compound rapidly in these areas, causing severe scale-related damage to the heat exchanger.
- Manufacturer warranty still valid. Submitting a handwritten note about a DIY flush is rarely accepted as sufficient documentation for expensive warranty claims.
Vinegar vs Commercial Descaler
The most common cheap DIY route involves using gallons of food-grade white vinegar from the grocery store. Vinegar does work mechanically to dissolve calcium scale, but its weak acidity level of around 2.5 pH makes the process incredibly slow.
We recommend using a dedicated commercial descaler like Hercules Haymaker or Whitlam Flow-Aide for rapid, safe results. These professional, citric acid-based formulas are VOC-free and work three times faster than household vinegar.
A typical descale cycle comparison highlights the difference:
- Commercial descaler: 45 minutes circulation, full effect stripping the walls bare.
- White vinegar: 3 to 6 hours circulation, partial effect often ending with thick scale remaining.
Most DIYers using vinegar lose patience and end the cycle at 60 to 90 minutes. The flush felt complete to the user, but the weak acid actually left the vast majority of the damaging scale firmly in place.
The Warranty Math
Almost every major manufacturer strictly conditions their warranty upon receiving documented professional annual maintenance. A DIY flush leaves no official paper trail, giving the manufacturer an easy way to deny an expensive claim.
Brands like Navien clearly state that damage caused by improper maintenance procedures will void the coverage entirely. A homemade flush presents three major warranty risks:
- It does not generate a licensed plumbing service report.
- It skips resetting the unit’s internal service counter.
- The manufacturer cannot verify the chemicals or procedures used if a claim is filed.
We see homeowners shocked when their $200 annual savings evaporate instantly. Years of undocumented flushes equal a voided warranty when a heat exchanger eventually cracks, leaving you with a $1,500 out-of-pocket repair bill by year eight.
What a Real Service Costs vs DIY Savings
Evaluating the true cost of diy tankless flushing requires comparing the upfront price against the long-term risk of equipment failure. In 2026, the average cost for a professional tankless flush ranges from $150 to $250, while the full maintenance package offers the best protection.
We compiled this breakdown to show the true financial impact of each approach:
| Approach | Annual Cost | Risk Profile |
|---|---|---|
| DIY flush only | $30-$80 (descaler + initial pump) | High risk of warranty denial and scale remaining |
| DIY full process (with filter swap, etc.) | $80-$120 | Medium risk due to lack of official warranty documentation |
| Professional flush only | $150-$250 | Low risk with documented but partial service |
| Professional full maintenance | $200-$350 | Lowest risk with full coverage and guaranteed valid warranty |
For the full annual maintenance package that includes flushing plus the other 5 service steps, see our maintenance checklist guide.
Our technicians handle everything required to keep your system running perfectly. For booking, our maintenance service keeps the warranty paperwork clean and your unit operating safely.
Frequently Asked Questions
Does my tankless have isolation valves?
Is vinegar good enough to descale a tankless?
What's the warranty risk of DIY flushing?
Related Guides
Hard Water and Tankless Descaling Requirements
TX, AZ, IN, NV, UT have widespread hard water that destroys unflushed tankless units. Scale-inhibitor and softener options, signs, and cost consequences.
How Often Should I Service My Tankless Water Heater?
Annual baseline, every 6 months in hard-water states. Why skipping service voids warranty and shortens lifespan from 20+ years to tank-equivalent.
Signs Your Tankless Water Heater Needs Maintenance Now
Reduced flow, longer warm-up, error codes, audible scaling, lukewarm output — each tied to root cause. When to book service before damage cascades.
Annual Tankless Water Heater Maintenance Checklist
Step-by-step what a proper annual tankless service covers: descale, filter, vent, combustion, leak check, performance test. What cheap providers skip.